개발 환경 구축
vscode에서 eslint, bable, webpack을 설치하고 개발환경을 구출
폴더 생성 및 프로젝트 init
1
2
| $ mkdir <project-name> && cd <project-name>
$ npm init -y
|
-y를 입력하면 package name, version등의 질문없이 package.json파일을 생성
eslint
eslint 설치
1
| $ npm install --save-dev eslint eslint-config-airbnb-base eslint-plugin-import eslint-plugin-html
|
--save-dev를 사용하면 배포시에는 포함되지 않음
vscode eslint extension 설치
VS Code ESLint extension 설치
VSCode의 settings에서
eslint: validate검색 - edit in settings.json 선택
or
open settings (json) 선택 후
"eslint.validate": ["javascript", "html"]추가
.eslintrc.js
.eslintrc.js 생성 및 룰셋
1
2
3
4
5
6
7
8
9
10
11
12
13
14
15
16
17
18
19
20
21
22
23
24
25
26
| module.exports = {
env: {
browser: true,
commonjs: true,
es6: true,
node: true,
jquery: true
},
extends: "airbnb-base",
plugins: ["import", "html"],
rules: {
"no-var": 2,
"no-console": "warn",
"quotes": ["error", "single"],
"no-underscore-dangle": "warn",
"no-plusplus": ["error", { "allowForLoopAfterthoughts": true }],
"comma-dangle": ["error", "never"],
"no-nested-ternary": 0,
"func-names": 0,
"prefer-template": 0,
"no-underscore-dangle": 0,
"no-useless-return": 0,
"class-methods-use-this": 1
}
};
|
rules는 개인에 맞게
Babel
Babel: ES6+ 코드를 ES5 이하 버전으로 트랜스파일링
설치
1
2
3
| $ npm install --save-dev @babel/cli @babel/core @babel/plugin-proposal-class-properties @babel/preset-env
$ npm install @babel/polyfill
|
Webpack
Webpack: 의존 관계에 있는 모듈들을 하나의 자바스크립트 파일로 번들링하는 모듈 번들러
Babel과 Sass의 컴파일로 Webpack으로 관리
설치
1
| $ npm install --save-dev babel-loader css-loader mini-css-extract-plugin node-sass sass-loader style-loader webpack webpack-cli
|
webpack.config.js
1
2
3
4
5
6
7
8
9
10
11
12
13
14
15
16
17
18
19
20
21
22
23
24
25
26
27
28
29
30
31
32
33
34
35
36
37
38
39
40
41
42
43
44
45
46
47
48
| const path = require('path');
const MiniCssExtractPlugin = require('mini-css-extract-plugin');
module.exports = {
entry: ['@babel/polyfill', './src/js/app.js', './src/sass/style.scss'],
output: {
path: path.resolve(__dirname, 'public'),
filename: 'js/bundle.js'
},
plugins: [
new MiniCssExtractPlugin({ filename: 'css/style.css' })
],
module: {
rules: [
{
test: /\.js$/,
include: [
path.resolve(__dirname, 'src/js')
],
use: {
loader: 'babel-loader',
options: {
presets: ['@babel/preset-env'],
plugins: ['@babel/plugin-proposal-class-properties']
}
},
exclude: /node_modules/
},
{
test: /\.scss$/,
use: [
MiniCssExtractPlugin.loader,
'css-loader',
'sass-loader?outputStyle=expanded'
],
exclude: /node_modules/
}
]
},
devtool: 'source-map',
mode: 'development'
};
|
poiemaweb.com
package.json 수정
1
2
3
| "scripts": {
"test": "echo \"Error: no test specified\" && exit 1"
},
|
"scripts" 를 수정
1
2
3
| "scripts": {
"build": "webpack -w"
},
|
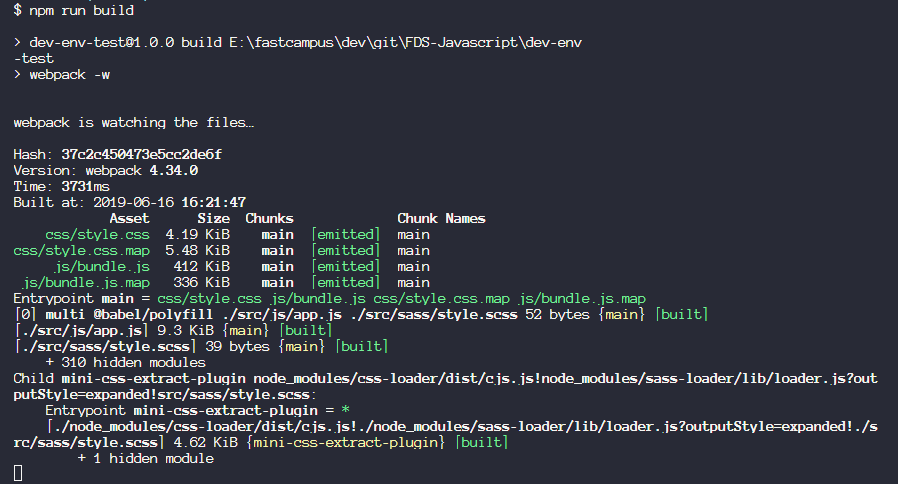
npm build를 통해 webpack을 실행하면 감시와 함께 webpack이 bable과 sass를 로드하여 트랜스파일링한 후 해당 소스를 이용하여 파일을 생성
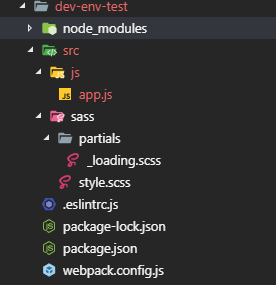
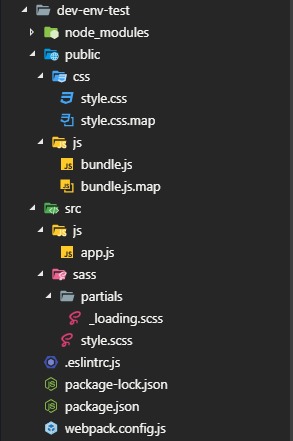
디렉토리
구조
Project/
├─ public/   # root
├─ src/      # source
│   ├─ js/
│   └─ sass/
│       └─ partials/
테스트
파일들 준비
완료